Having explored a natural seagrass meadow we now turn our attention to
the keeping of seagrass within an aquarium. Given the conditions and
the nutrient dynamics discussed pertaining to natural meadows we now
have a greater understanding of their needs and what they can bring to
a reef aquarium system. When used as a refugium plumbed into a
reef display aquarium the nutrient processing and production of
an aquarium reef system is enhanced and negates the need to use
equipment and other products that attempt to do what nature does best, if allowed to.
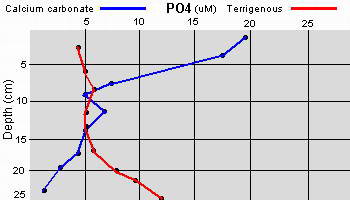
Sediments
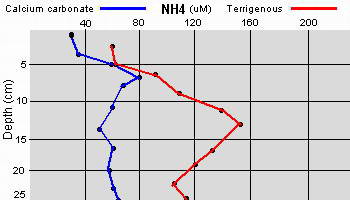
- The seagrass refugium's sediment is vital to the health and
long term survival of the seagrass just as it is in natural meadows.
How you construct the sandbed is going to determine its
functionality in providing a nutrient rich environment for the
seagrasses rhizomes and root structures. Seagrasses
are plants that depend upon their roots for the uptake of
nutrients, roots that require extremely fine grain sizes, it
will be imperative that a calcium carbonate substrate with grain sizes
ranging from 0.2 - 1.02mm be used with a depth of no less than six
inches, deeper if possible. Incorporating a live mud into the
sediment during the sand beds construction will ensure a
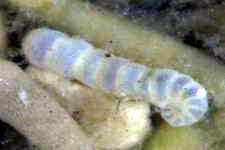
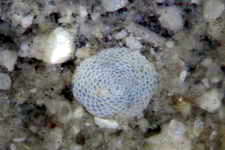
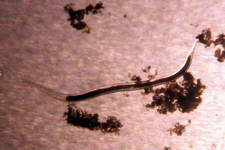
suitable number of infauna are introduced. Just as in nature the
infauna are critical to the functionality of any sandbed to process
nutrients and prevent the formation of sand clumps by their movement
through the sediment (Shimek 2001).
Patience -
With the refugium plumbed inline with the rest of the aquarium
system now comes the most difficult part of it all. The wait. It
will take at least six months to one year for the sediments to have
become enriched enough to support the requirements of the seagrasses
(Calfo 2005). To rush the introduction of the plants will most
likely ensure their loss. Having been uprooted, transported and
their root systems likely damaged, the plants will need everything to
be in their favor to get off to a good start.
Indo-Pacific Plant Selection
- With the construction of the sandbed having been completed you
now have at least six months to determine which species are available
to you and study their husbandry. My experience with any of the
seagrasses is limited to the indo-pacific species yet through my study
and recent attempts at keeping indo-pacific seagrasses it appears they all share
some basic needs and care requirements, evident by their all being
found within the same seagrass meadow.
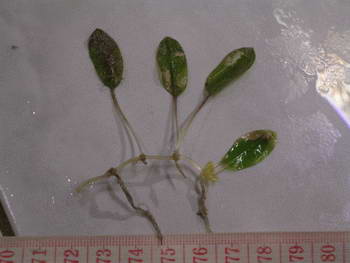 Halophila ovalis
appear to be the most tolerant of less than ideal handling
and capable of surviving being shipped with bare roots and wrapped
in moist paper towels for a number of days (Borneman 2008). Being
a pioneer species may account for this hardiness as they
are frequently the first species to grow into uncolonized
soft substrates. This apparent ability to go where no plant has gone
before
would in my opinion make them the best candidate for establishing a
seagrass habitat with the later introduction of other seagrass
species. Their very short growth and relatively low lighting needs
in comparison to other seagrasses make them ideal for placement in
coral reef aquariums as
there is no danger of this seagrass shading or becoming abrasive to the
corals and will tolerate the lowered light intensity found at the
aquarium's sediment level.
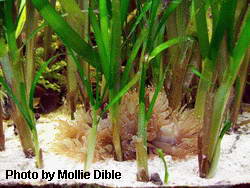 Thalassia hemprichii
 - While not as common as
T. testudinum (shown in the photo),
the
two species share very similar morphology and husbandry requirements.
Given such similar morphology, I doubt many hobbyists can distinguish
between the two other than by knowing where they were collected. With
T. testudinum
being an Atlantic species it is most likely that those hobbyists in the
United States will use this species as their first seagrass keeping
attempt(s) as it would be the most readily available of
the species. While not impossible to maintain, this species
does appear to be sensitive to uprooting and the
subsequent exposure to air.
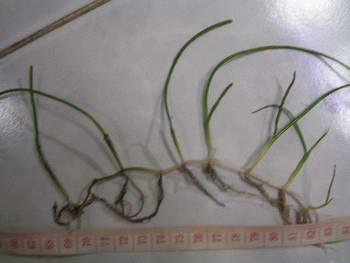 Syringodium isoetifolium
 - Second only to the
Halophila sp. in its ability to colonize. I have found
S. isoetifolium to be hardy and fast growing. It transplants much easier than the
Thalassia sp.
with a high rate of survival. This species would make a good
addition to either a newly established or mature seagrass aquarium,
able to colonize rapidly while making a suitable companion species with
established
Thalassia spp.
Normally not growing as tall as the Thalassia, it is not affected by
partial shading and with their very thin, tubular leaves they pose no
risk of shading the wider bladed
Thalassia spp. either.
These traits between the two genera may explain their combination
being the dominant structures in natural seagrass meadows here in the
Philippines.
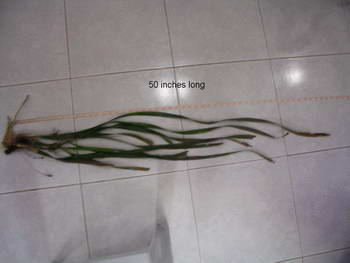 Enhalus acoroides -
 With
leaves averaging a length of 130cm and 3cm wide with root systems that
can extend well beyond 30cm deep, this species is not a realistic
choice for home aquarium systems. For scale, the floor tiles
shown in the photo are each a square foot with the plant being so long
that I had to stand on a chair to get the entire plant into the frame.
However, if one were to set up a suitable aquarium for this species it
would make for a very unique display. The affect of such a
planted aquarium would be reminiscent of a kelp forest.
Lighting the Seagrass Aquarium
- Given the environment the seagrasses are found in as discussed
previously it should be obvious that they require high light
intensity to thrive. Estimates from various studies (Kenworthy 1996)
done on the minimum lighting requirements of seagrass species have
shown that their lower toleration limit to be in a range from 24% to
37% of the light just beneath the water surface which equates to
photosynthetically active radiation (PAR) levels of between 200 to
600 PAR at wavelengths between 400nm and 700nm. Levels below these
minimums result in the seagrasses producing shorter and fewer leaves,
obvious indicators that more light intensity is needed over the
aquarium. Extended periods of light levels below their minimum
requirement places a stress on the seagrasses that some species are
unable to recover from.
Halophila spp. are the exception and have much lower lighting requirements.
Since most hobbyists have their own preferences in the lighting systems
that they use, I am not going to suggest any particular type of
lighting and instead stress again the importance of light
intensity to the seagrasses. How that intensity is provided is
irrelevant unless it has an impact on animals being kept within the same system due to heating of the water.
Water Flow & Temperature - Tropical
seagrasses have a high thermal tolerance averaging 90 degrees fahrenheit and live close to
their thermal limits in the shallow, protected environments they
are found in. An aquarium that maintains the average
Indo-Pacific coral reef water temperature of 82F is well within the
temperature range that tropical seagrasses are adapted for, those
aquariums that maintain lower than normal coral reef
temperatures may encounter slower seagrass growth and their
failure to thrive. Temperature is second only to light intensity
pertaining to tropical seagrasses primary needs.
Water
flow through the seagrass aquarium should not include the use of
powerheads or other high flow pumps and instead simply allow the
overflow volume from the rest of the system to provide bulk water
movement that will not suspend the leaf litter and detritus and
encourage diversity of fauna and infauna.
Water Parameters
- Being a plant, the seagrasses utilize the same common nutrients
as terrestrial plants. Nitrogen, phosphorus, iron and carbon
dioxide, most of which is absorbed by the roots from the sediment with
the exception of carbon. Phosphorus will not normally be a limiting
factor in an aquarium system due to the input the system receives
through the addition of food. Nitrogen and iron is more likely to
be utilized first by algae and bacteria and may become limiting to the seagrasses.
These limitations can be overcome by the use of plant food sticks
or tablets (Borneman 2008) pushed down into the sediment near the
plant's roots. It is unlikely that nutrients provided in this
manner will have any affect on the system unless the sediment is
disturbed allowing the release of the nutrients into the circulating
water.
Planting the Aquarium
- Now that the long wait is over with the sediment having been
given time to sequester nutrients and the plant species selected for
planting, its time to break out the gardening tools and... actually
you will need nothing more than your gloved hand to accomplish the
delicate task of placing your seagrasses into the sediment.
The roots of seagrasses are fragile with any
damage done being the biggest factor in losing purchased
plants. This
is unavoidable when purchasing seagrasses from commercial sources as
the roots are usually stripped of any sediment to lessen the shipping
costs involved with heavy sediments (Calfo 2005). A good reason
to start out with the hardier species that are
known to have a relatively high survival rate when transported in such
a manner. If seagrasses are being shared or purchased from a
local established seagrass aquarium then you have the opportunity to
collect individual plants with less damage or disturbance to the roots
by gently moving the sediments to expose the rhizome and cutting the
rhizome with scissors in six inch lengths. Once cut, gently lift
the plant so as to keep as much of the root attached sediments intact
and place the plant in a suitable container while being held under
water (Borneman 2008).
Having collected seagrasses from the
local meadows, I have found that it is much easier to properly plant
such lengths of the seaweed by simply making a trench in the aquarium's
sandbed and gently place the rhizome and its roots into the trench and
cover with sediment. Do not force or push the rhizomes into the
sediment as it will only break the rhizome and cause further damage.
Again, having access to the local seagrass meadows means that I
can take extra measures to tip the plants survival rate in my favor.
A shallow, wide tupperware container and a spatula allows me to
lift entire sod sections containing the rhizomes, roots and all of
its surrounding sediment gently into a tupperware container (all done
underwater) for easy transport back to my aquarium. Digging a
suitably sized pit into the sandbed I can then lower the tupperware
onto the sediment and gently slide the entire sod section into the pit
and cover with a centimeter or two of sand.
Once planted,
it is not uncommon for the seagrasses to drop all of their leaves due
to the shock of having been disturbed. With their relatively fast
rate of leaf production, new leaves should begin to emerge within a
week or two at most. You can help ensure the plant has
additional nutrients to replace its lost leaves and to recover
more quickly by following a tip from Eric Borneman who has had
increased success with newly planted seagrasses by purchasing
freshwater plant food tablets that are broken in half and pushed down
into the sediment close to the plant's root structures.
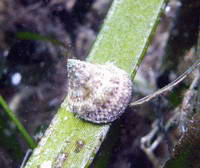
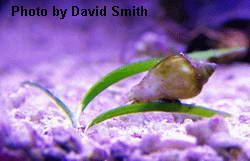
As with any available lighted surface, microalgae will grow upon
the seagrasses leaves and shorten the leaves usefulness to the plant
by blocking the available light. With
Astralium spp.
being the most commonly found snail consuming the microalgae on
seagrass blades in natural meadows and being the most commonly sold
species, they would make the best choice for keeping your seagrasses
clean of epiphytic microalgae. A good stocking number to start out with
would be one snail per plant, increasing their numbers if you find that
the snails are unable to keep up with microalgae growth. I feel I
should point out that these species are most often sold to the reef
aquarium hobby not because they are suitable for our rocky coral
displays, they are not, but simply because they are found in great
numbers in the seagrass meadows and with the meadows being nearshore
and easily accessed they are collected by simply wading through the
meadow and picking them off the seagrasses without any need for scuba
gear as is required to collect the snail species that are found in
coral reef areas.


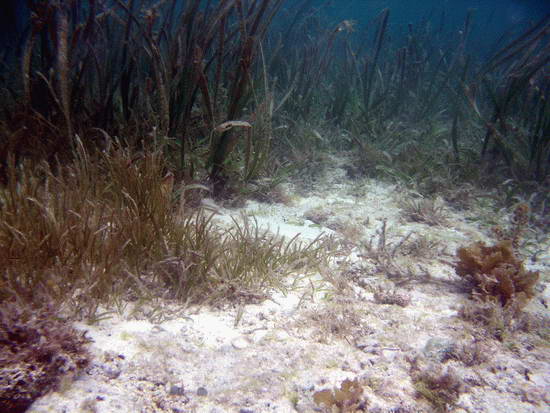
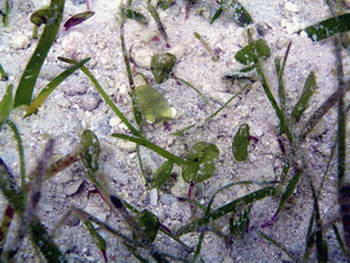 The paddle shaped Halophila
ovalis having pioneered open sand substrate allowing Thalassia hemprichii to
follow.
 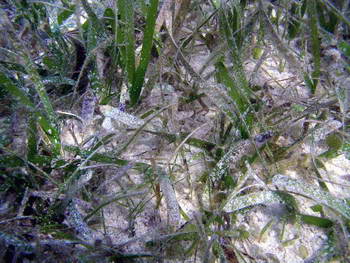 A young seagrass bed having been fully colonized by Thalassia hemprichii
and Syringodium
isoetifolium thus overgrowing and pushing out the pioneer Halophila ovalis.
The thick layer of leaf litter has yet to accumulate as found
in mature beds.
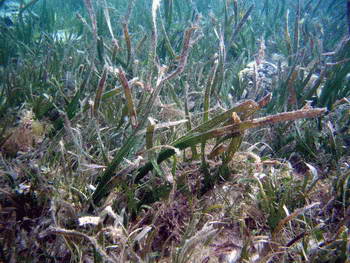 A mature seagrass bed containing multiple species of seagrass and
having developed a thick layer of leaf litter. The fully developed
canopy also provides yet another habitat utilized by many fish and
invertebrate species, some being full time residents while others
follow the tide in from the deeper reef to hunt for food within these
very rich hunting grounds. What seems most important for the
associated species is the provision of shelter and food supply
resulting from their extraordinarily high rate of primary production.
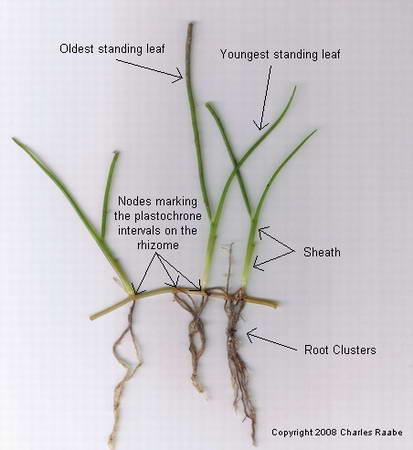
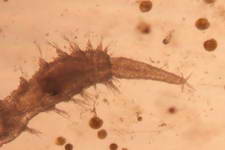
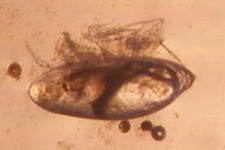
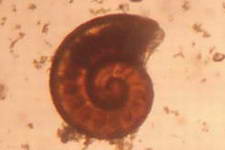
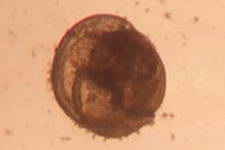
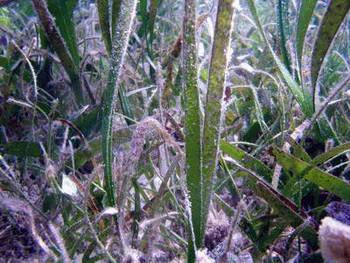 The high productivity of seagrass beds is the product of not only the
seagrasses but also a variety of epiphytic organisms that use the vast
amount of surface area provided by the seagrass leaves on which to
grow. The most abundant of the epiphytic organisms are the
microalgae, providing as much as 46% of the autotrophic production of
seagrass beds. Since seagrasses are not known to produce any toxins or
have any mechanisms to control the attachment and growth of
epiphytes, epiphytes can be found on all exposed parts of the
seagrass.
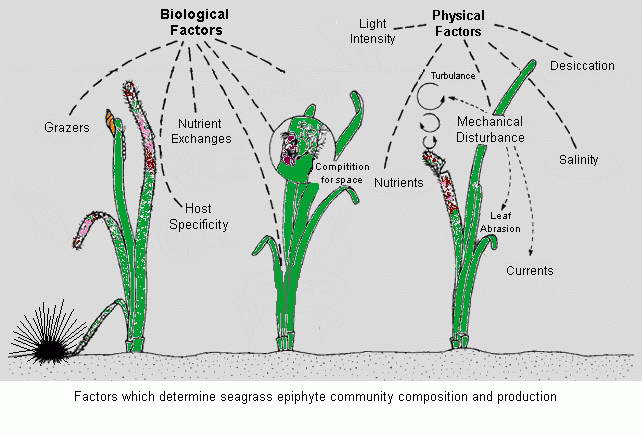
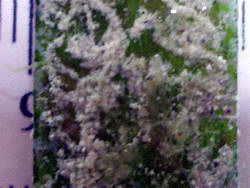 As each leaf is covered in epiphytes, the ability of the leaf to
perform photosynthesis is reduced and reaches a point where the leaf is
of no use to the plant anymore. The leaf is cast off, along with
any epiphytes unlucky enough to have settled on what seemed a
permanent home. The cast off leaf now further enriched with other
life becomes part of the leaf litter mat and is acted upon by bacterial
and fungi creating the detrital matter that so many other organisms
find of use. Having lost a leaf, the plant then pulls even more
nutrients out of the sediment to create a new leaf to regain its
photosynthesis capacity and makes sediment bound nutrients available
once again. In turn, yet another new surface area arises for the
epiphytes to colonize, and so the circle begins again. With
individual leaf life spans having been estimated to be anywhere from 3
to 10 days, there is a vast amount of organic material that a seagrass
meadow is producing in a single week.
 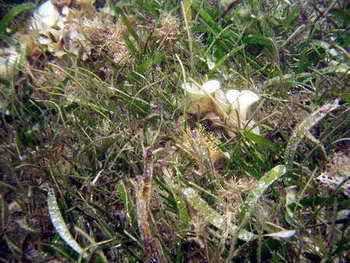 A tropical seagrass meadow will also likely contain macroalgae species (Bell 1997)
that have either grown as epiphytes on any of the available surfaces or
having been carried into the area by water currents and snagged on the
seagrass blades. In mature seagrass meadows, the unstable leaf
litter does not present many substrates on which to attach other than
the seagrass leaves or the larger exposed rock fragments.
 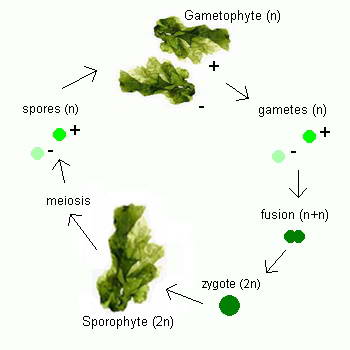 Ulva follows a reproductive pattern called alternation of generations, in which it
takes two generations to complete its life cycle, one that reproduces sexually and one that reproduces
asexually. Although mature members of both
generations look the same to the naked eye, microscopic chromosomal differences
distinguish one from the other. The first generation, which has
two complete sets of chromosomes (2n), the second generation has only one set of chromosomes
(n). The first generation, called
the sporophyte, undergoes asexual reproduction to form spores, tiny reproductive
cells that develop into mature individuals called gametophytes. Gametophytes
produce gametes, male and female reproductive cells that fuse together during
fertilization to produce a zygote, an organism with two complete sets of
chromosomes that matures into a sporophyte, thus completing the life cycle.
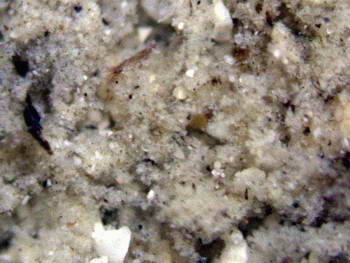 As the seagrass leaves are decomposed they release both particulate
and dissolved carbon and organic matter, which the bacteria and fungus
assimilate and transform into detritus (also known as marine snow), a
nutritionally important food source for detritivores. With
a wide range of animals that consume detritus in all habitats
throughout the oceans, it is of no surprise that given the massive
production found within seagrass meadows the diversity of detritivores
is equally as massive.
 Astralium okamotoi
is the most abundant of the gastropods within the local seagrass
meadows, not selective in its feeding, leaving only the encrusting species behind.
Other commonly found snails include the Euplica sp., Trochoidea sp. and the Cerithidae sp.
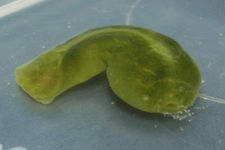 Phanerophthalmus smaragdinus is
one of many herbivorous slugs, possibly a detritivore as I only find
them amongst the leaf litter where they can avoid predation.
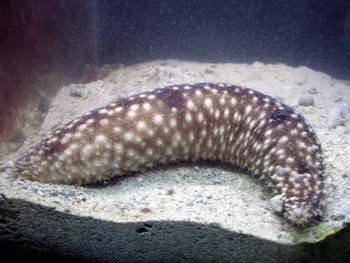
 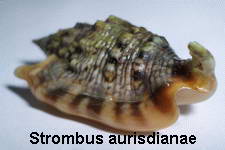 The only large gastropod found, feeding upon the epiphytic and
drift macroalgae that it can reach as it is restricted to the floor of
the meadow due to its size. Its movement on and in the leaf, detritus
litter and sediment helps to distribute nutrients through disturbance.
Human collection for food has greatly reduced their numbers.
 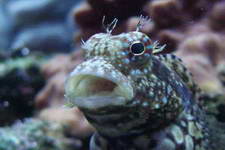 Salarias fasciatus
also known as the lawnmower blenny is the most numerous of the
herbivorous fish with small juveniles found amongst the leaf litter
making forays up to the seagrass blades to forage the epiphyte algae
growth. During periods of high tide, schools of both adult and
juvenile rabbitfish species enter the seagrass meadows to graze upon
drift Ulva spp. and seagrass epiphyte growth.
 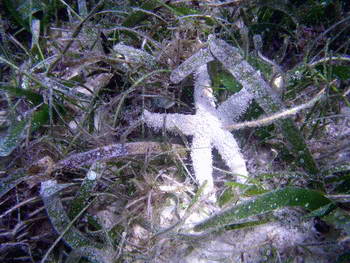 Invertebrate predators such as this Archaster sp.
(sand sifting starfish) are permanent residents of the seagrass beds as
they consume the infauna of the sediment. Other large
invertebrate predators include most other starfish species, hermit
crabs, the swimming crabs and many other crustaceans.
 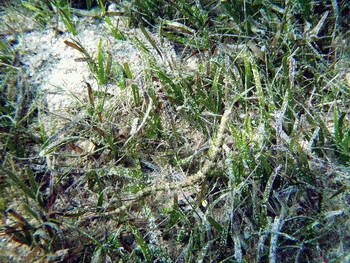 Fish Predators such
as this pipefish are also abundant given the high productivity of
the seagrass ecosystem. As shown above, fish such as this
pipefish species are clearly full time residents, evident by their
coloration and markings allowing them to blend in with the seagrass.
File fish species also take the same colorations and markings while
the flamboyantly colored fish species make themselves obvious as to
their having come into the seagrass meadows from the coral reefs and
are thus transitory opportunists.
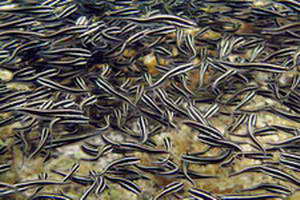 Schools of both juveniles and subadult Plotosus lineatus (striped sea catfish) are a common sight as they leap frog over each other sifting detritus and sediment infauna.
 Complex.
The only single word that best describes the diversity and
nutrient webs that the seagrass meadows provide. Doing the
research for this article has made me much more aware of what used to
be a little thought of habitat, giving me a greater appreciation
and a sense of gratitude that the seagrass meadows are where they are.
Without such meadows, the coral reefs that we tend to focus on
would be less for it.
 Halophila ovalis
appear to be the most tolerant of less than ideal handling
and capable of surviving being shipped with bare roots and wrapped
in moist paper towels for a number of days (Borneman 2008). Being
a pioneer species may account for this hardiness as they
are frequently the first species to grow into uncolonized
soft substrates. This apparent ability to go where no plant has gone
before
would in my opinion make them the best candidate for establishing a
seagrass habitat with the later introduction of other seagrass
species. Their very short growth and relatively low lighting needs
in comparison to other seagrasses make them ideal for placement in
coral reef aquariums as
there is no danger of this seagrass shading or becoming abrasive to the
corals and will tolerate the lowered light intensity found at the
aquarium's sediment level.
  Thalassia hemprichii - While not as common as T. testudinum (shown in the photo), the
two species share very similar morphology and husbandry requirements.
Given such similar morphology, I doubt many hobbyists can distinguish
between the two other than by knowing where they were collected. With T. testudinum
being an Atlantic species it is most likely that those hobbyists in the
United States will use this species as their first seagrass keeping
attempt(s) as it would be the most readily available of
the species. While not impossible to maintain, this species
does appear to be sensitive to uprooting and the
subsequent exposure to air.
 Syringodium isoetifolium - Second only to the Halophila sp. in its ability to colonize. I have found S. isoetifolium to be hardy and fast growing. It transplants much easier than the Thalassia sp.
with a high rate of survival. This species would make a good
addition to either a newly established or mature seagrass aquarium,
able to colonize rapidly while making a suitable companion species with
established Thalassia spp.
Normally not growing as tall as the Thalassia, it is not affected by
partial shading and with their very thin, tubular leaves they pose no
risk of shading the wider bladed Thalassia spp. either.
These traits between the two genera may explain their combination
being the dominant structures in natural seagrass meadows here in the
Philippines.
  Enhalus acoroides - With
leaves averaging a length of 130cm and 3cm wide with root systems that
can extend well beyond 30cm deep, this species is not a realistic
choice for home aquarium systems. For scale, the floor tiles
shown in the photo are each a square foot with the plant being so long
that I had to stand on a chair to get the entire plant into the frame.
However, if one were to set up a suitable aquarium for this species it
would make for a very unique display. The affect of such a
planted aquarium would be reminiscent of a kelp forest.
  The roots of seagrasses are fragile with any
damage done being the biggest factor in losing purchased
plants. This
is unavoidable when purchasing seagrasses from commercial sources as
the roots are usually stripped of any sediment to lessen the shipping
costs involved with heavy sediments (Calfo 2005). A good reason
to start out with the hardier species that are
known to have a relatively high survival rate when transported in such
a manner. If seagrasses are being shared or purchased from a
local established seagrass aquarium then you have the opportunity to
collect individual plants with less damage or disturbance to the roots
by gently moving the sediments to expose the rhizome and cutting the
rhizome with scissors in six inch lengths. Once cut, gently lift
the plant so as to keep as much of the root attached sediments intact
and place the plant in a suitable container while being held under
water (Borneman 2008).
  As with any available lighted surface, microalgae will grow upon
the seagrasses leaves and shorten the leaves usefulness to the plant
by blocking the available light. With Astralium spp.
being the most commonly found snail consuming the microalgae on
seagrass blades in natural meadows and being the most commonly sold
species, they would make the best choice for keeping your seagrasses
clean of epiphytic microalgae. A good stocking number to start out with
would be one snail per plant, increasing their numbers if you find that
the snails are unable to keep up with microalgae growth. I feel I
should point out that these species are most often sold to the reef
aquarium hobby not because they are suitable for our rocky coral
displays, they are not, but simply because they are found in great
numbers in the seagrass meadows and with the meadows being nearshore
and easily accessed they are collected by simply wading through the
meadow and picking them off the seagrasses without any need for scuba
gear as is required to collect the snail species that are found in
coral reef areas.